Showing posts with label big boy room. Show all posts

Tuesday, August 21, 2012

big boy room peek

The big boy room is pretty much complete.  I haven't gotten a chance to take real shots of everything but here is a little peek!


I'm happy to say the transition to a big boy bed has been a smooth one and strangely the room feels larger with a twin bed than it did with a crib. 

Hilary over at My So-Called Home was kind enough to pass along the Liebster award to me.  She is a fellow New Jersey resident and her home has a lot of similarities to mine.  I love seeing her updates and style.  I'll be pack with the answers to the 11 questions she posted so you can learn a little more about moi and I'll work on getting more pics of the big boy room.  Is it just me or are these summer days slipping by at an alarming pace?!

Friday, May 4, 2012

iron bed

I haven't mentioned much about the big boy room transformation in a while.  We are at a bit of a stand still.  Things are as updated as they can be until we put our little guy in a real bed.  At the moment we have removed the side of his crib so he has a toddler bed/day bed situation going one which he has been doing very well with.

I'm a little anxious to put him in a real bed so I can finish up the room but I don't want to rush it.  While we were driving to Trader Joe's the other weekend I spotted a yard sale with an old iron bed out front and screamed "I want that!!!!!" so we stopped the car and found an awesome antique iron bed on sale for just 45 bucks!  Old iron beds were generally made to whatever size they wanted and they don't adhere to the twin, full, queen, king world of today.  This bed frame was just a few inches wider than a twin and the same length.  Sold!  We crammed it in the car and still went to Trader Joe's then returned home with a trunk full of junk!

We brought the bed frame down in the basement when we got home so I could check it out further and realized that one of the bed rails wasn't fitting quite right.  They are tapered pin rails and once I examined them a little closer I realized one fit the headboard and footboard properly and the other was very similar but didn't slide all the way in.

I got a little swept up in the purchase and didn't look at it as closely as I should have.  Without finding a welder or trying to purchase some other antique rails that would fit  (which are triple the price we paid for the whole frame on ebay) we wouldn't be able to make it work for our little guy in a way that I would be confident was safe.  We only paid $45 for the whole thing and I was pretty happy with that price for just the fantastic headboard.  So we decided we'll be painting it and attaching it to the wall then placing a regular twin bed frame in front of it.  Works for me!  The foot board might have shrunk his little room a bit too much anyway and maybe in the future we'll figure out a way to make it work.

Here is the headboard.


A terrible photo from the basement but you get the idea.  It is very tall and has a worn gold paint job at the moment.  We were unsure what color to paint it but then I saw this.

crate and barrel
and realized that is would be fantastic in black.  Especially against his light blue walls.  So that is the plan!  We just have to decide when to make the leap into a twin bed for him.  When did you transition your little one?  I think he would be fine with it but we are a bit hesitant because he is sleeping so wonderfully right now, who wants to mess with a toddler's sleep?!

We took a trip to an art supply store this morning.  It has been a while since I wandered around a proper art store not just A.C. Moore or Michaels.  Not that I don't adore those stores as well but a real art supply store is entirely different.  I got more supplies for my prints and enjoyed browsing all the goodies.  I'm a stocked up and ready to create so hopefully I'll have more to share soon.  Have a happy weekend.  It is supposed to stop raining here finally I think!

Tuesday, April 17, 2012

making the cut

I did it.

I cut the artwork.

But I have to tell you I'm glad I did.  I kept one in its original condition and framed it.  This is the one that the little guy did totally solo.


The other I was asked a few times " Mama you do" and so I made a brush stroke or two.  It was still his vision...

There were such excellent sections of it that I felt moved to chop it up,

and I'm glad I did because look how great they look


It's alright.  When he is rich and famous they will still be incredibly valuable even in their altered state.

Thursday, April 12, 2012

my artist

Once a month there is an art activity for kids at a local museum.  It is a really nice program and we've been going for about six months now.  Some times the little guy is into it.  Other times he would much prefer to peruse the refreshment table and wander about. 

Yesterday we painted and he was feeling it.  He hasn't really painted much.  I've given him watercolors to paint with now and then but he has never had real cups of tempura paint and a big brush and a cup of water.  The whole deal. 

Now I am a smidge biased here but aren't they fantastic?


I have these two little frames that have some owl drawings that I did in them.


I was thinking I could cut out two of my favorite sections of his paintings and frame them for his big boy room.  I'm hesitating a bit to cut them up though...   what do you think?

Wednesday, April 11, 2012

same lamp new color

Oh spray paint how I love thee.

I took this lamp.


and I taped off what I didn't want painted, stuck it in a box in the yard and sprayed it like crazy


and now it looks like this.


It is a great addition to the reading corner in the big boy room.


Truth be told we don't use the rocker all that much.  We end up on the floor when we are reading most of the time.  So the rocker will get moved out of here at some point and in it's place we'll put his blue chair which he loves to sit in.


I saw this idea and I love it.  So I plan to do the same on the wall underneath the red shelf.  I can't ever get enough books!

i heart organizing


between naps on the porch
Not Just a Housewife
Let Birds Fly

Tuesday, April 10, 2012

big boy room map gallery

The progress in the big boy room continues.  I tore more maps out of that good old atlas and we've got this.


Since we live in Jersey we had to include a map of NJ.  New York is where Mommy and Daddy are from and lived up until a few years ago and where lots of our family is so that is up there too.  Then we added two world maps, one standard, one polar.

I took the letter art I talked about here and replaced the green polka dot paper with a piece of a map of Europe.


We might add more over time but for now I'm happy with the configuration.


We're getting there!

savvy southern style
shabby Creek cottage

Wednesday, April 4, 2012

fabric covered roller shade

The window treatments in our little guy's room looked like this.


The white panels were from Target.  The valences were made by my mother for our bedroom in our last apartment and I put inexpensive roller shades on the window to block the light but they weren't terribly pretty.  It was time to make some changes.

I used some brushed nickel curtain rods that we had in our last apartment and moved the white panels higher up above the window.  I took down the valences and it was time for a roller shade makeover.

The shades started out like this.  Nothing fancy.  I got these from JC Penney but they are the same old inexpensive vinyl roller shades you can purchase anywhere.


I cut pieces of the stripe fabric I used on his stool to be a bit wider than the shade and long enough to cover the visible shade when it was fully lowered.

I ironed the fabric to get any wrinkles out, took out the spray adhesive and then quickly realized I shouldn't be doing this in the basement and brought everything up to the porch.


I sprayed the fabric with adhesive and smoothed it over the shade.  folding the excess over the bottom and sides of the shade so it looked nice and tidy.


 I worked in sections so I could make sure to get the whole thing nice and smooth.  Spray and smooth, spray and smooth.


Here it is all stuck on.


You can see there is some exposed shade at the top above my fabric.  My shade is much longer than the window itself so I made sure the fabric would cover the shade when fully lowered but didn't bother covering the part of the shade we'd never see.

I rolled up the shades nice and tight and replaced them on the hardware.  It took a couple times of raising and lowering to get the tension right and I had a moment at first when I thought it wouldn't function with the extra weight of the fabric but then it worked all of the sudden.  Since Sunday they have been raising and lowering with ease.  I may have to reglue the edges now and again.  I think the sun beating on them from outside could be tough for the adhesive in the long run but I'll let you know how that goes.


I think they look so much more polished and interesting and the best thing is I didn't have to buy anything new but they look totally different!

brassy apple
between naps on the porch
Mommy by Day Crafter by Night
at the picket fence

Tuesday, April 3, 2012

vintage map banner

I decided to go with the striped ribbon after hearing your opinions here.  This project couldn't be much easier.  I took our old or "vintage" atlas and started cutting until I found a nice size for the triangles that would make up the banner.


Then I used that triangle to trace a bunch more and cut them out with an x acto knife.  Don't mind the ribbon in the photo above.  It was a bit I had around and I was trying to get an idea before I found the new ones.

Once they were all cut out it was time to glue.


I ran a bead of hot glue along the top of each triangle and laid the ribbon down over it.  I left about an inch between the triangles.  That was that!

Up they went on the wall.


We've just got some yellow thumbtacks holding them up.  Still trying to figure out if we'll pretty that up a bit.


So cute right?


Monday, April 2, 2012

distressed letter

After seeing this clever technique for creating an aged, peeling look on something I thought I'd transform this L in our little one's room.


It is a paper mache letter I got from JoAnn's.  I decoupaged this owl fabric on it before our son was born and it has been on his wall since.


I love those little owls but my Mom also used this fabric in a quilt for him so painting over these birds doesn't mean goodbye.

Out the L came to be sprayed in the yard.


I wish I had better photos of the steps I took but the process just kept going until I liked what I had. 

I sprayed a coat of silver spray paint.  Then I sprayed a little black here and there.  Then I rubbed a bar of soap on it like Megan explained.  Then I painted the whole thing with red paint.


See the bar of soap in the box?  At this point it kinda looked like a mess.


but THEN I started sanding it and the red chipped away to reveal the silver and black underneath and it looked like old metal and it was really cool with the sun sparkling down on it.  So I ran it inside to see what it looked like in my son's room.  It looked dark and not nearly as interesting as it did in the sunlight.  Hmmmm.....     I don't have a photo of this phase because I frantically decided to rub more soap on and paint a layer of white semi gloss paint on it.  The same paint we use for all the trim in our house.   When I say "paint" I mean slap a messy layer on with a foam brush. 

Once it was sort of dry I started sanding it again and peeling and chipping and it began to take on the look of old weathered wood.  It looked like some old letter you might find at an antique store and get all excited about until you take a look at the price tag and they want $100 for this old chipped letter and you walk away bummed because you love it but $100 is crazy talk. 

I ran inside to see if the awesomeness that I was seeing outside would translate to inside and well you be the judge...


 I kinda love it.  The colors against the blue wall and the way the red, silver and black peek through the white paint.  With all the other changes we are making in there it really works.  The best part is it looks like this heavy wood or metal letter but it is just paper mache and we can hang it over our little one's bed without any worries of safety.

The big boy room is coming together and I love how it is looking.  I'll be sharing more throughout the week.

Sign up to follow me via GFC or linky followers!

thrifty decor chick
boogie Board Cottage
between naps on the porch
Our Delightful Home
the kutz corner
mommy by day crafter by night
not just a housewife
french country cottage

Thursday, March 29, 2012

little stool for the little guy

Thanks for your ribbon votes yesterday.  I decided to go with the striped ribbon for the banner.  I'll be sharing that as soon as we get them up on the wall.  We've got some patching and painting to do first!

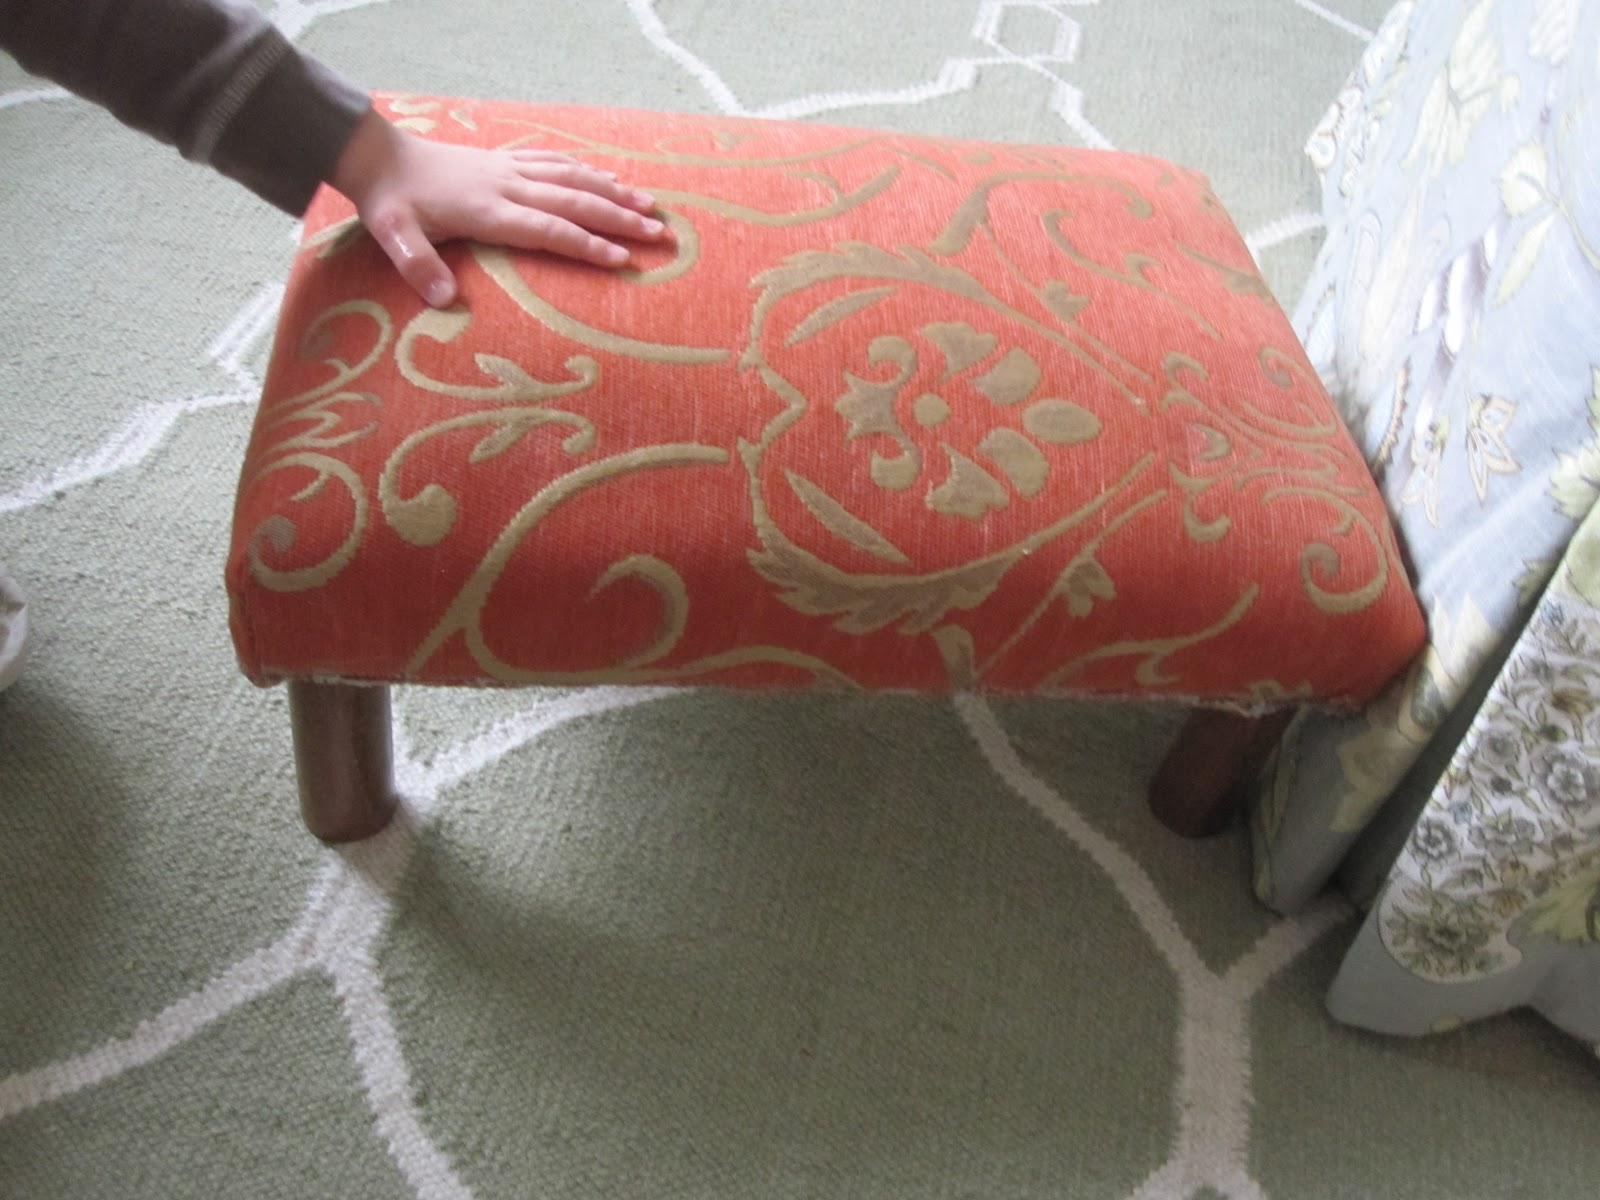
When we went to my Aunt's house the other weekend our son spotted a little stool she had and starting sitting on it immediately.  She had purchased it to help her dog get up on a chair without hurting her back but her dog wasn't interested in it.  She offered it up to us and we gladly took it.


It was cute as it was but it didn't fit in with our decor and we were hoping to use it in our little guy's big boy room.

So I ripped off the tassles.


Then pulled off the staples that attached the fabric.

I decided the fabric we used in the basement that we are now using in the big boy room transformation would be perfect.


So I flipped her upside down, unscrewed the legs and got to stapling.  No art form there really.  One side gets a staple, the other gets a staple and so on.  The corners take a bit of finessing but you just fuss until it looks good.  In about 10 minutes I had this.


I cut out a piece of felt and hot glued it on to cover the staples and give it a more finished look on the underside. 


It looks adorable in the big boy room.


There is lots more to be done in there but it is coming together in my mind and that is half the battle!


It has already supplied endless fun.  You can carry it around.  Sit on it, stand on it, rest your feet on it while sitting in your blue chair.  Ah to be 2 1/2!

the shabby creek cottage
let birdz fly
the shady porch
at the picket fence
French Country Cottage
miss mustard seed
its overflowing